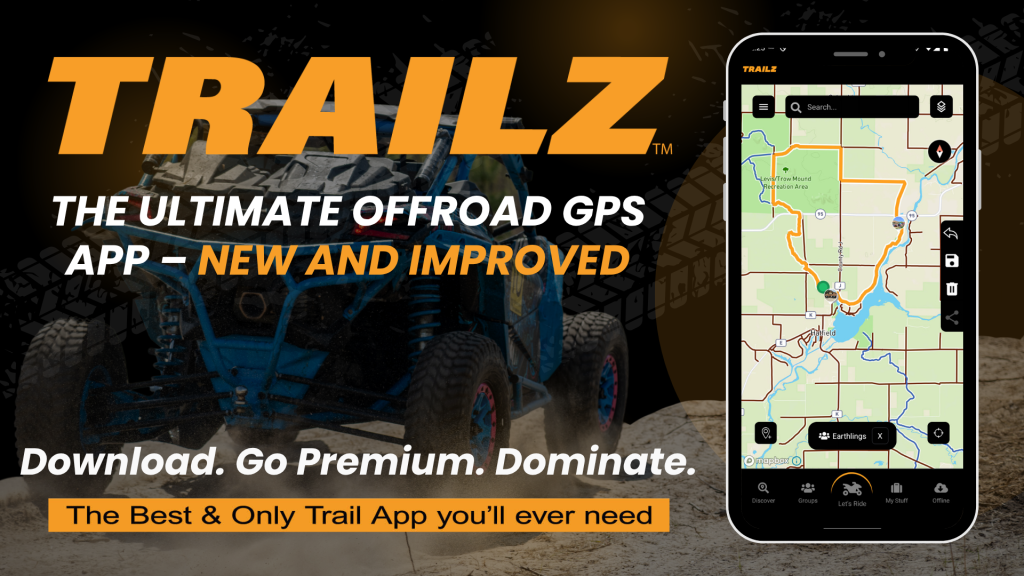
Free to Start, Premium for Full Power
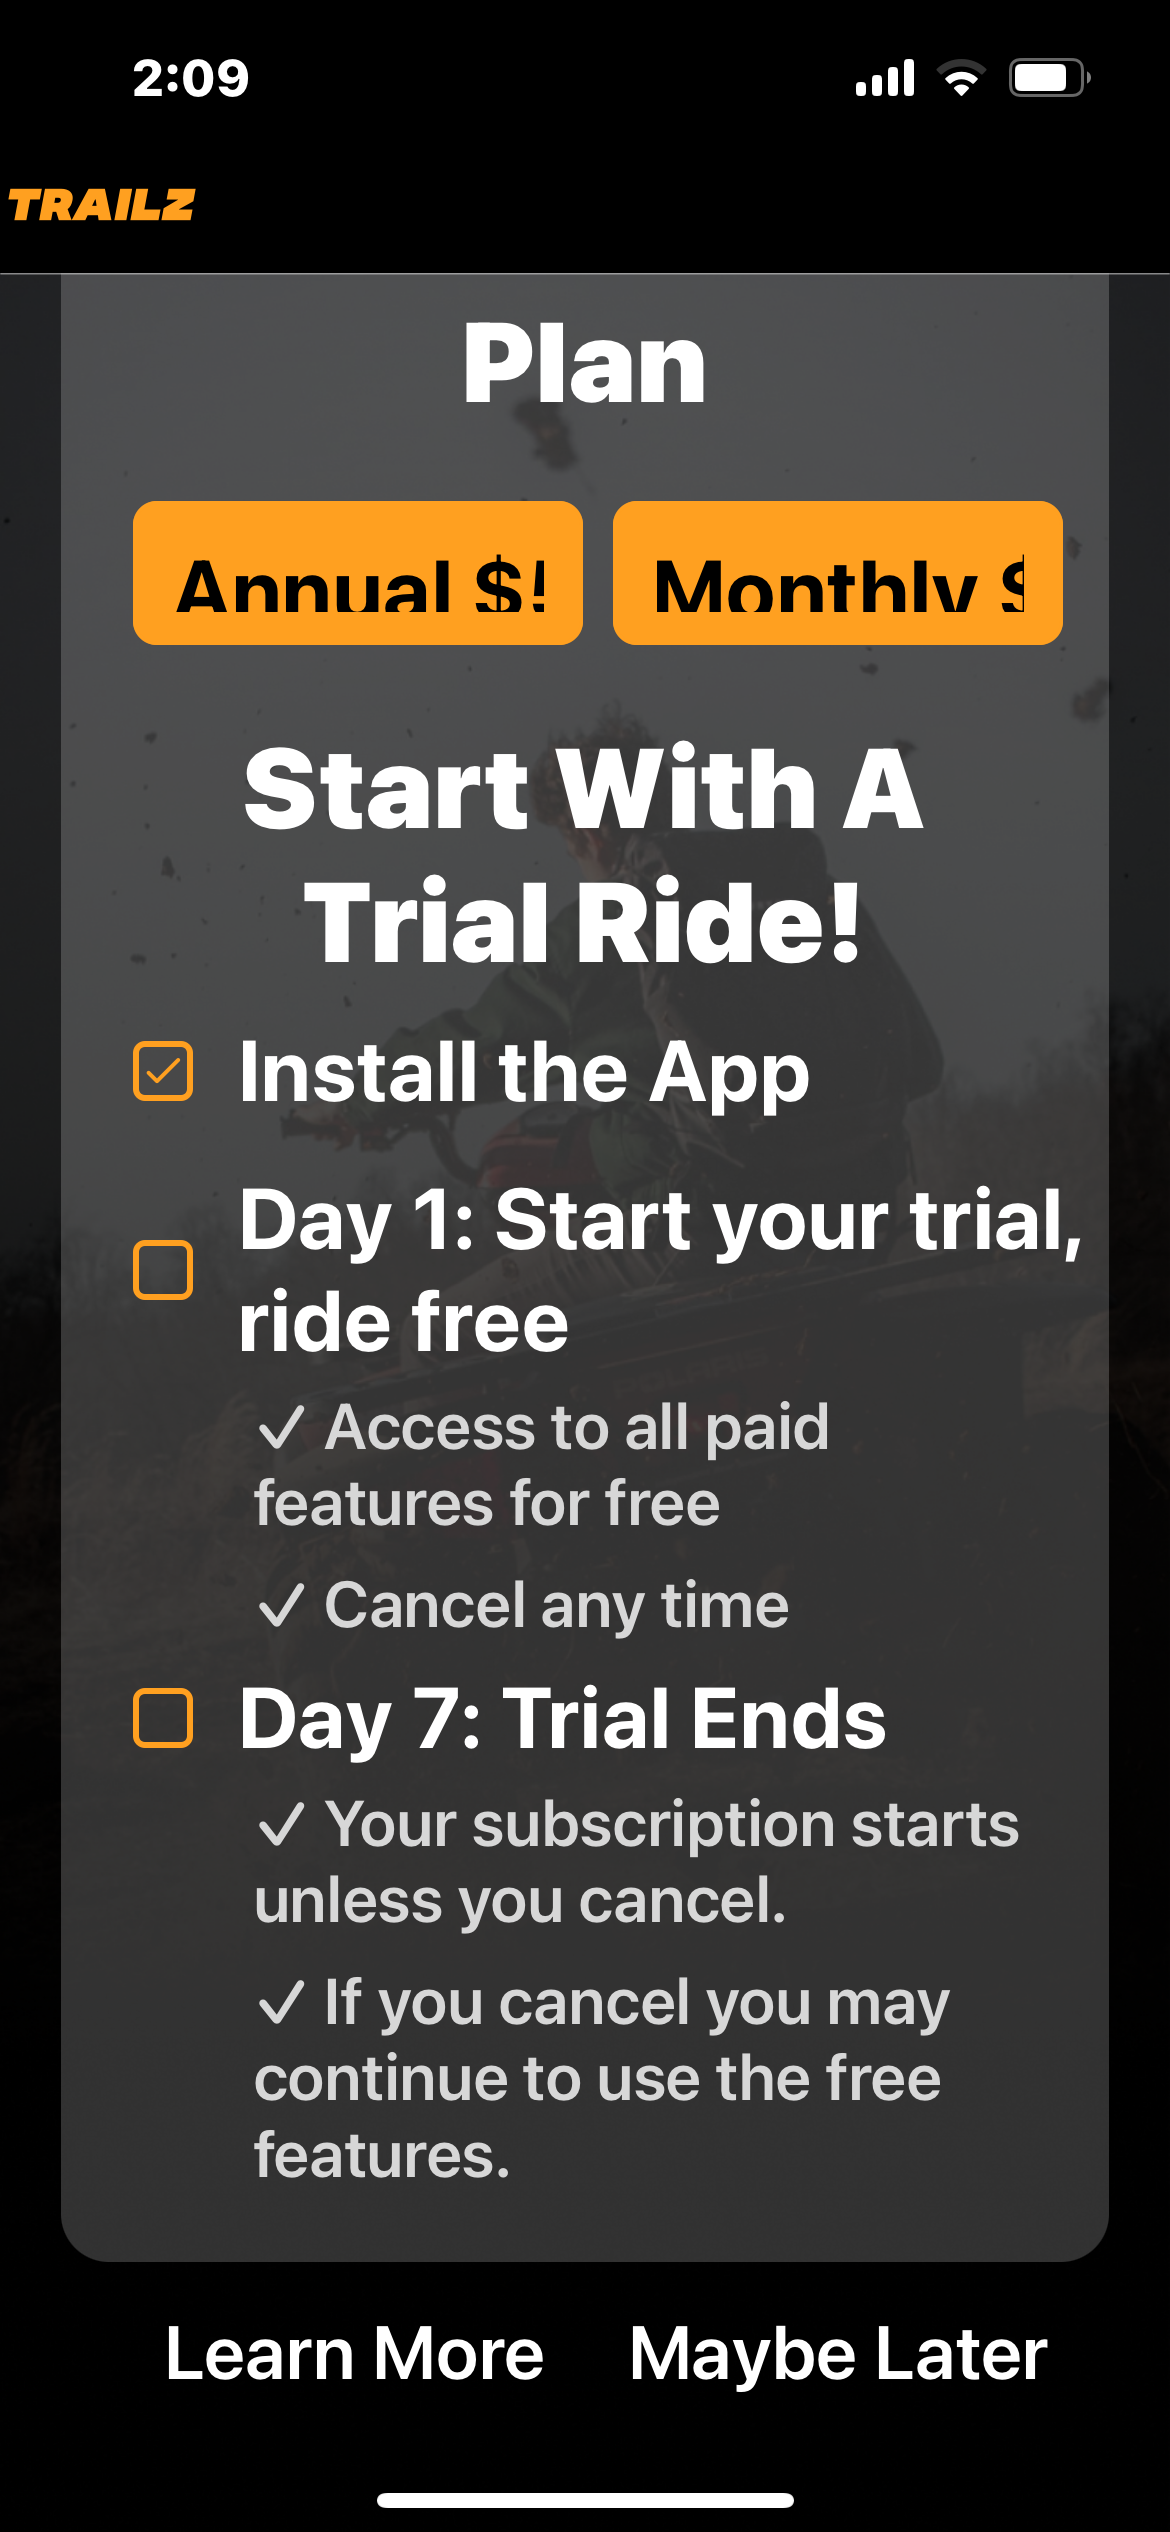
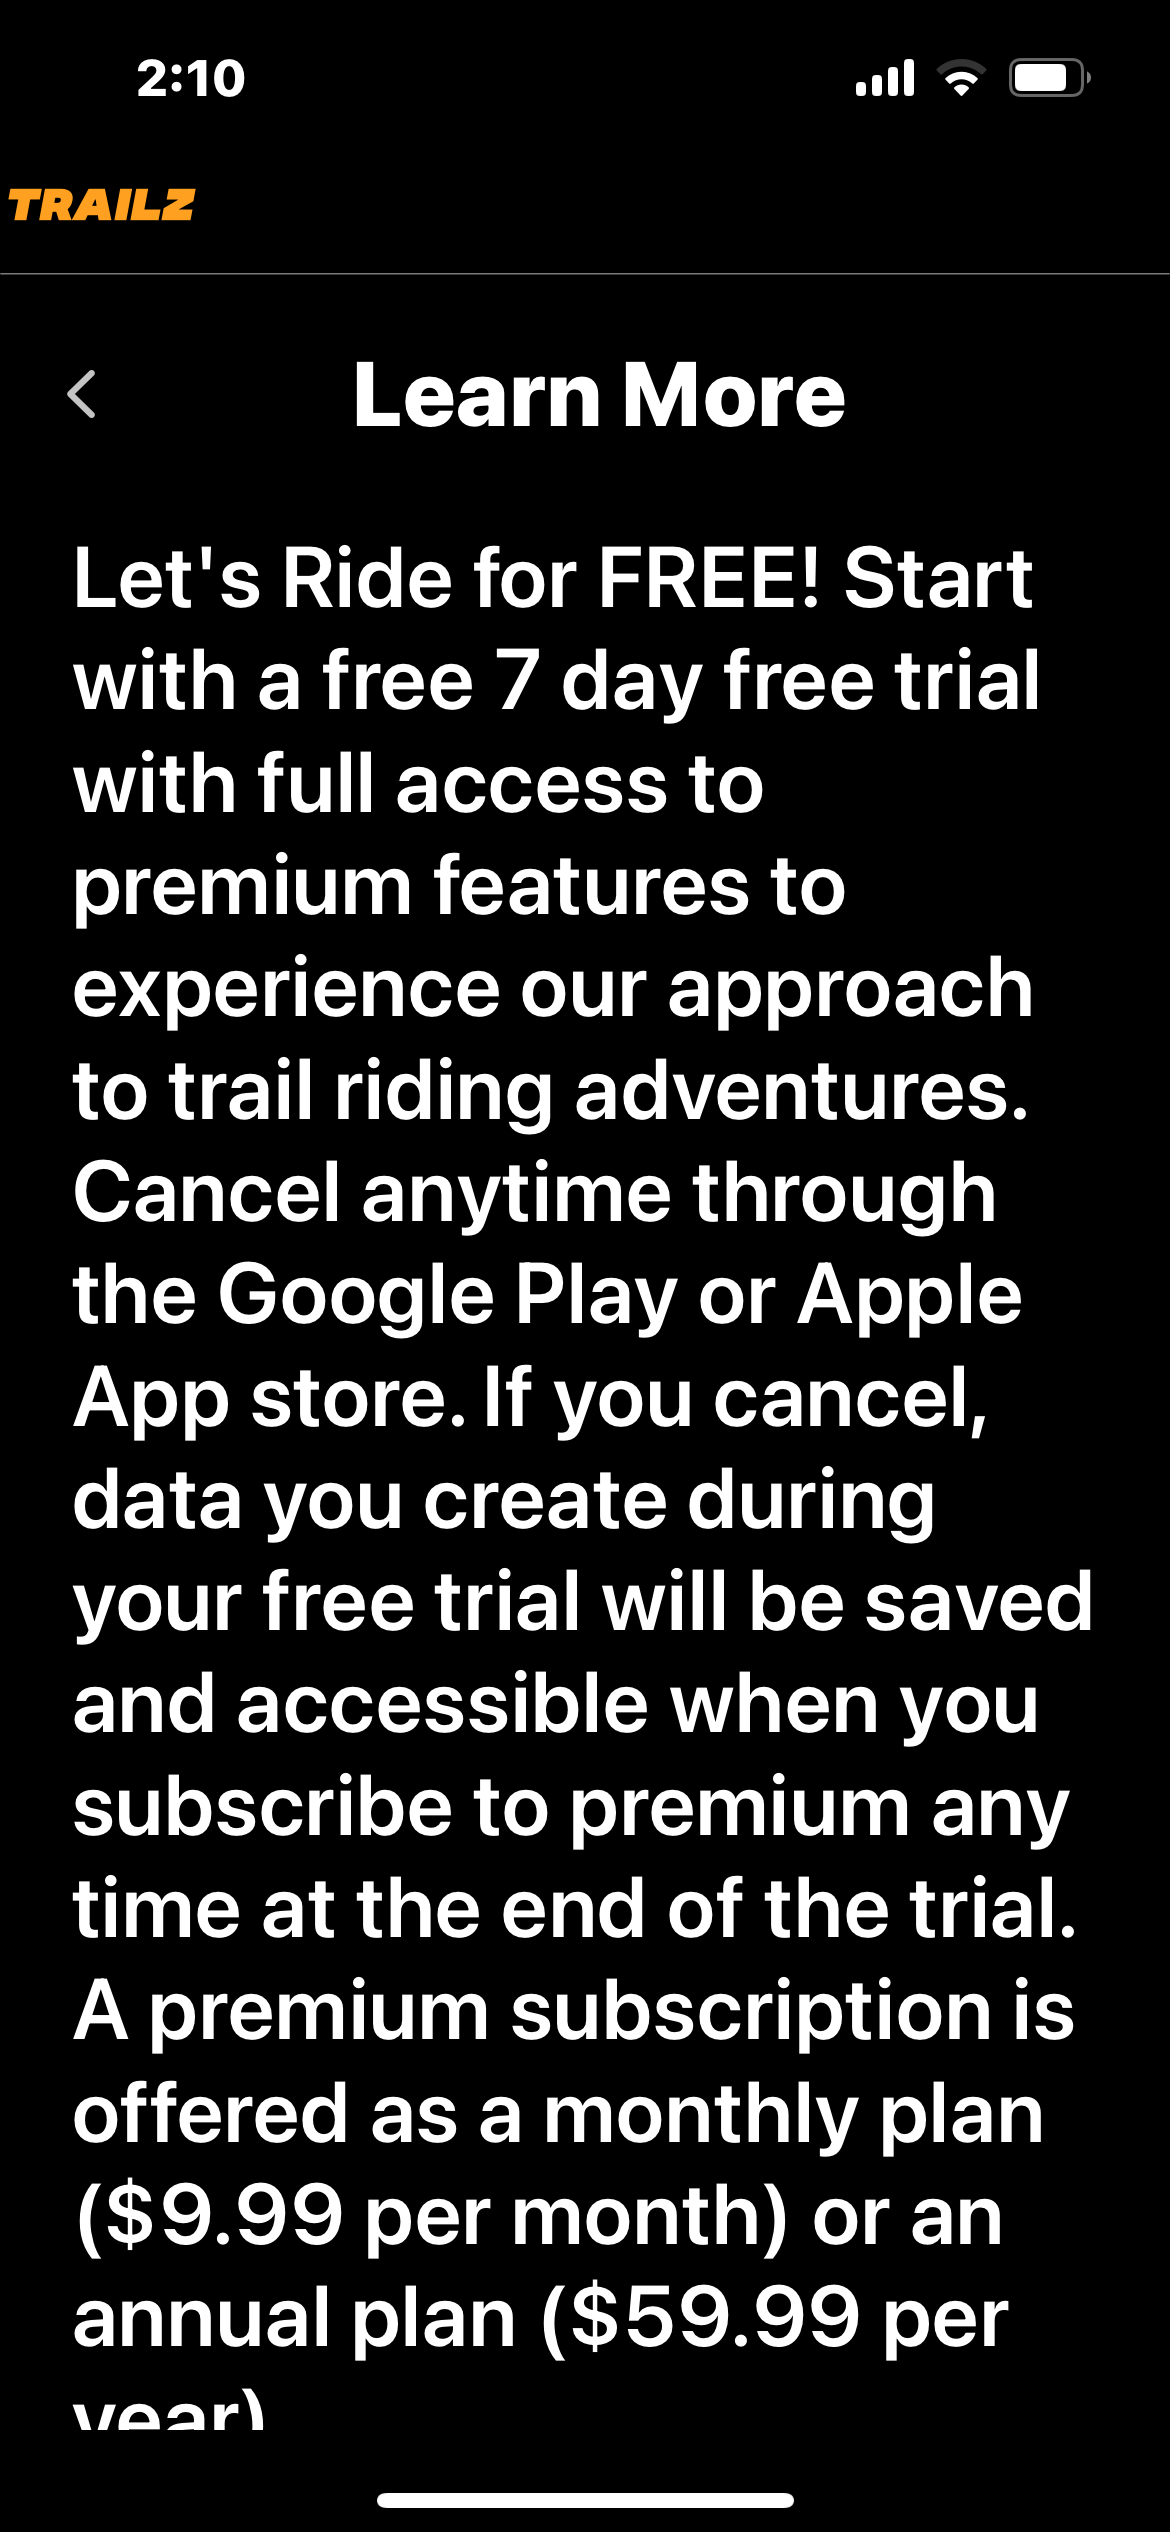
TRAILZ is free to try and offers Premium tools for riders who want the full experience.
● Free Version: Browse trail maps and join group rides.
● Premium ($9.99/month or $59.99/year with a 7-day free trial): Create rides and clubs, download offline maps, save routes, and track your ride history.